Official Guide · First-Time Setup
Shadowrocket Setup Guide
Start by adding an existing server or subscription. Then configure routing, connect, and check the results with a real request.
01 Import Your Details
Add a Server or Import a Subscription in Add Server
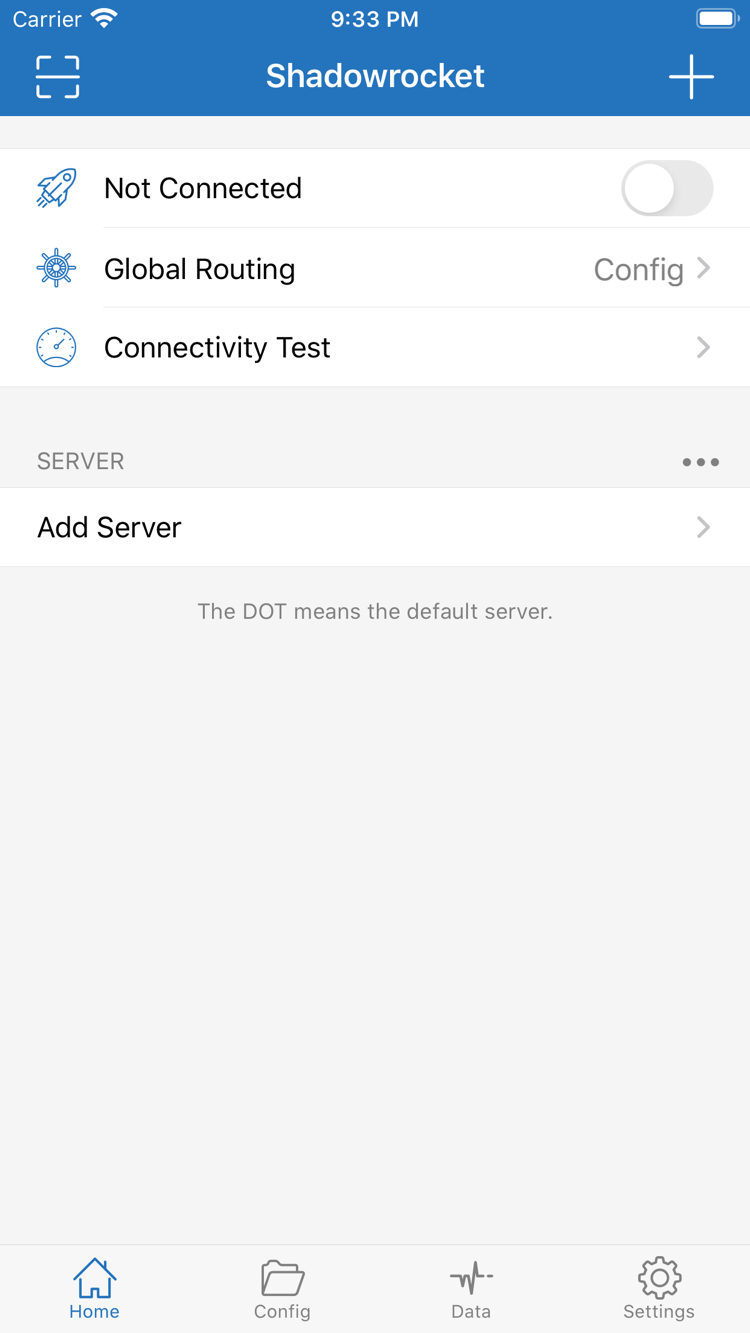
Open Shadowrocket and go to Home. Find Add Server in the SERVER section and open it. First, identify the details you have: a set of fields such as protocol, host, and port is for a single server; a subscription URL provided by your service is used to retrieve a group of entries. Do not paste a subscription URL into the Host field for a single server.
Enter a Single Server Manually
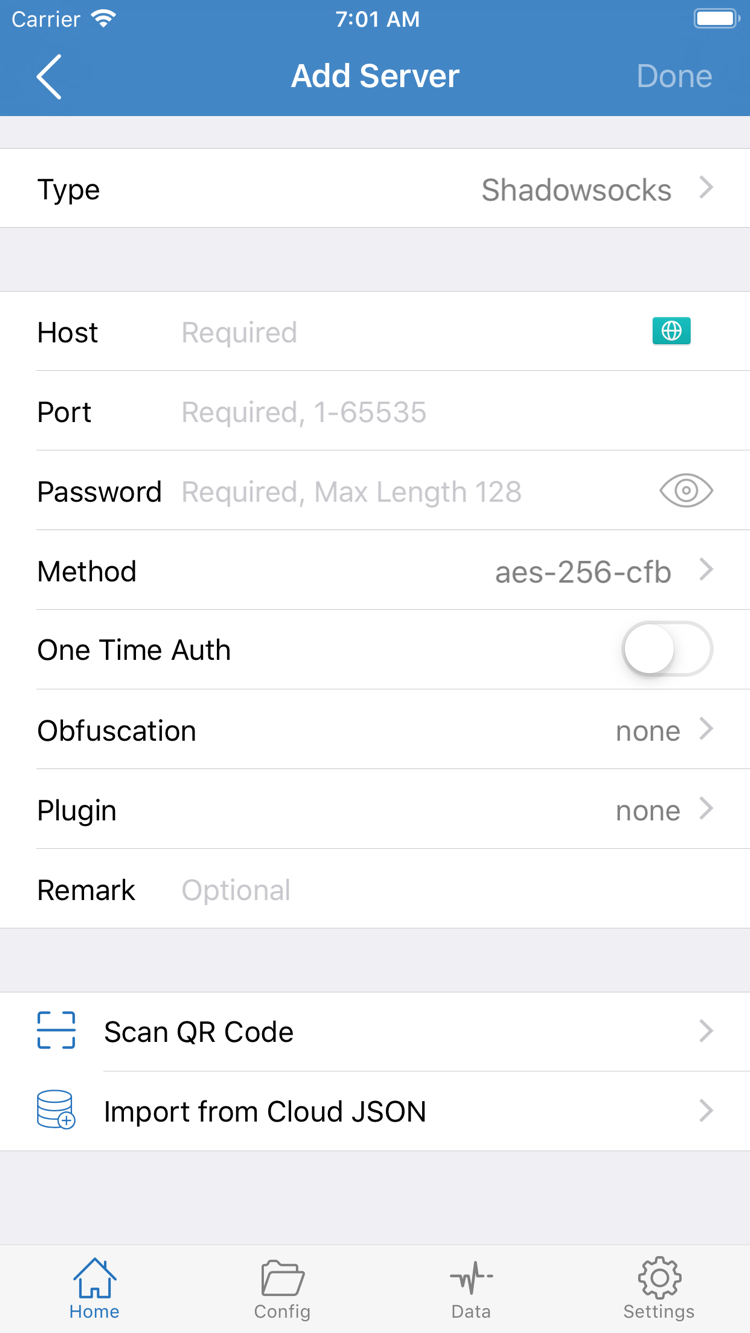
Choose the protocol listed in your details under Type, then check the fields shown for that type. In the example shown, enter the hostname or address in Host and the port number in Port. If the selected type shows Password or Method, enter or select the values from your details. Do not infer values from similarly named fields for another protocol. Check that pasted text has no extra spaces at either end, and do not put the host and port together in one field. Save, return to Home, and confirm the new entry appears under SERVER.
Import an Existing Subscription with Subscribe
In Add Server, choose Subscribe, enter the full subscription URL provided by your service, and save. When copying it, keep any parameters after the question mark and do not include notes along with the link. Return to Home, wait for the list to load, then expand the group and confirm it contains selectable servers. If the group appears with no entries, troubleshoot the subscription import rather than treating the empty group as a successful import.
If you have a QR code for a single server, use Scan QR Code in Add Server. After scanning, check the type and key fields. Import from Cloud JSON in the screenshot is a separate import option, not a substitute for Subscribe. Once you have checked the list, note which server you will test. First choose how traffic should be handled, then connect.
02 Choose a Mode
Choose a Traffic Mode in Global Routing
Return to Home and open Global Routing. This setting determines how traffic is handled; it does not select a server or start the connection. To check everyday rule-based routing, start with Config. For a one-off comparison, temporarily select either of the other two modes, then switch back to your original selection afterward.
- Config: Requests are handled according to the rules in the active configuration, which can send them through a proxy, directly, or to another specified policy. Use it to check whether different destinations are routed as expected.
- Proxy: Traffic handled by the app goes through the proxy route instead of being routed rule by rule from the configuration. Use it temporarily to check whether the selected server can handle a real request.
- Direct: Traffic handled by the app is sent without going through a proxy server. Use it as a comparison on the same device and network. This does not turn off the connection switch on Home.
When Using Config, Check the Configuration File First
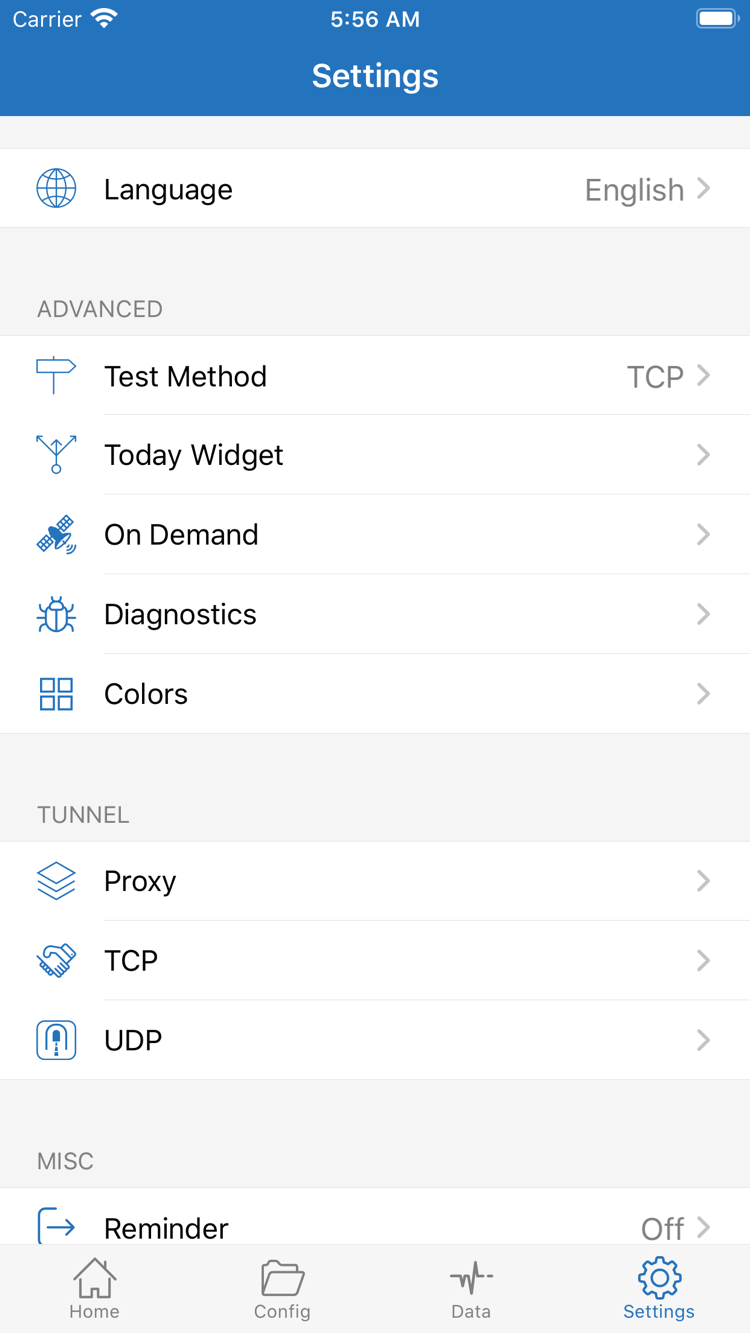
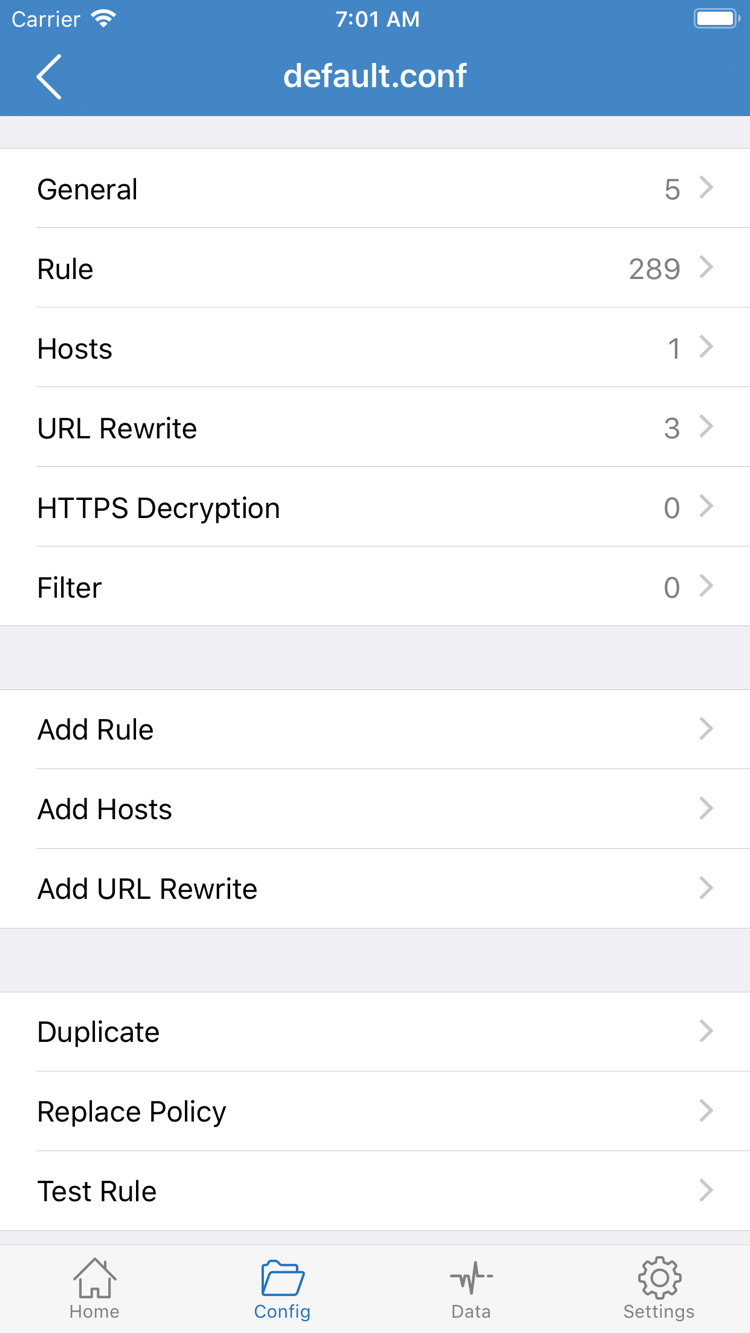
When Global Routing on Home shows Config, rules are in use. The Config tab at the bottom is where you view and manage configuration files. Open it to confirm which file is active, then open its editor and review Rule. Similar file names do not mean the configurations have the same contents. General, Hosts, and Rule in the screenshot serve different purposes. For an initial routing check, focus on Rule; there is no need to change every section.
For example, DOMAIN-SUFFIX,example.com,PROXY means requests matching that domain suffix use the PROXY policy. To verify it, choose a destination that is actually covered by a rule in the configuration. Check whether an earlier rule matches first and which fallback policy handles unmatched requests. You do not need to tap Add Rule before connecting for the first time. Test an existing rule first; once you can distinguish server issues from rule issues, you can make changes. See Technical Reference for protocol parameters and Routing Modes for mode details.
03 Connect
Turn On the Connection from Home
Return to Home, expand the group you imported under SERVER, and select the server you want to use. If the group contains several similarly named entries, make sure you have selected the one you intend to test. Check the current Global Routing mode again in case you left a different option selected during the comparison. To verify rules, keep the mode set to Config.
Toggle the switch at the top of the screen next to Not Connected. The first time you connect, your iPhone or iPad may show a system prompt to add a VPN configuration. Confirm that the prompt is for Shadowrocket, then follow the system instructions to allow it and complete device authentication. Return to Home and wait for the connection status to update. If it immediately returns to Not Connected, follow the troubleshooting steps to check authorization and connection conflicts instead of repeatedly toggling the switch.
A connected status at the top only means a connection has been established on the device. It does not prove that the selected server works or that a website matched the expected rule. For your first test, keep the device on the same network and note the current server, mode, and configuration file. This lets you repeat the test under the same conditions if the result is unexpected.
04 Check the Results
Verify with Connectivity Test and a Real Request
Tap Connectivity Test on Home and wait for the results to update. Check the entry you selected; do not judge it by the results for a nearby server. A successful result only means that entry responded under the network conditions and test method at that time. A timeout does not necessarily mean the configuration is wrong; the test destination may be unreachable or the network may be unstable. To verify a specific use case, make a real request next.
Test Both Routes in Config Mode
In Config mode, find a destination expected to use DIRECT and another expected to use PROXY in the active configuration. Open a browser or the relevant app and make each request again, checking that the content is not cached. If matching records are available, find each request by its timestamp and check the actual destination domain and policy against the order of rules in Rule. The main domain in a browser's address bar may not represent every request: images or login endpoints can use different domains. A page loading successfully does not prove that all its traffic matched the same rule.
If Results Differ, Change One Setting at a Time
If only a destination expected to use the proxy fails, keep the network and selected server unchanged and temporarily switch to Proxy to test the same destination. If it works in Proxy but fails in Config, check the rule or policy that actually matched the destination first. If it fails in both modes, check the server details and test method. For a Direct-route comparison, temporarily switch to Direct and check how the same destination behaves without the server. When finished, switch back to the original mode and repeat the test with the original settings.
05 Find the Cause
Check Settings and Connection Conditions by Symptom
Start with the earliest step where the problem occurs. If entries did not load, check the import. If the switch will not stay on, check the device connection. If connected but some requests fail, check the server, test method, and rules. Change one setting at a time, then repeat the step that failed.
The Group Is Empty, or Entries Are Still Missing After Import
Return to Add Server and check that you selected Subscribe, that the URL is complete, and that it is still the current URL provided by your service. For a manually added server, check that Type matches your details and that Host and Port are not swapped. Reimporting the same URL usually will not explain the cause. If you need to ask for help, share the error message and the steps that led to it, but do not share the full subscription URL, password, or key.
The Switch Turns Off Again, or the Connection Restarts After Disconnecting
If the switch turns off again, first check whether you confirmed the initial system prompt and whether another VPN connection is active on the device. Devices managed by an organization may restrict configuration changes; if you see a management prompt, check with your device administrator. If the opposite happens and the connection resumes after you disconnect manually, open Settings and check whether On Demand is enabled. Note the network conditions when it reconnects, then check whether an on-demand rule triggered it. Do not confuse automatic reconnection with a server test timeout.
Connectivity Test Times Out, or Only Some Apps Have Access Issues
Note the Test Method in Settings, then return to Home and test the same server again. If you have another server from the same subscription, compare it without changing the mode or network. If only one fails, check that server's details first; if several fail, check the device's basic network connection and test conditions. If the test succeeds but only some apps have issues, check the available diagnostic information in Diagnostics. Note when the failure occurred, the destination domain, and the active mode, then use the verification steps to investigate. Record the details before changing anything; do not change rules, switch servers, and change networks all at once.